이름:
메일:
가입일:

프론트엔드 개발 블로그입니다.
Nextjs 15(React 19) App Router로 개발되었습니다.
2024-08-10 20:08조회수: 471[운영자]영이
모름지기 개발자라고 하면
다른 사람이 쉽고 편하게 사용할 수 있는
라이브러리 제작정도는 한 번 쯤 목표로 잡아본 적이 있지 않을까 한다.
웹팩과 같은 모듈 번들러에 대한 기본적인 이해가 필요하기 때문에
진입장벽이 생각보다 높지만,
한 번 해보면 그렇게까지 어려운건 아니라는걸 알게된다
라고 했지만
사실 거의 일주일을 삽질하고
자꾸 cjs로 빌드돼서 너무너무너무 힘들었다 ^^
하지만 결국해냄!

npmjs.com 들어가서
회원가입하고 자주 사용하는 브라우저로 미리 로그인 해둔다.
npx create-react-app my-app --template typescript
우리는 리액트 라이브러리를 만들 것이므로
create-react-app을 쓰도록 한다.
용량이나 성능 최적화를 위해 vite나 rollup 등으로 customizing 하는 케이스도 있겠지만
지금은 가벼운 라이브러리 하나 만드는 거에
배보다 배꼽이 더 큰 행위를 할 수 없으므로 CRA를 사용하도록 한다.
{
  "name": "react-tag-maker", // 패키지 이름
  "version": "1.0.50",
  "private": false, // 혼자만 볼건지, 남들도 볼 수 있는지
  "files": [ // 배포할 파일들 목록
    "dist/",
    "LICENSE",
    "package.json",
    "README.md",
    "CODE_OF_CONDUCT.md",
    "CONTRIBUTING.md",
    "babel.config.json"
  ],
  "type": "module",
  "repository": {
    "type": "git",
    "url": "https://github.com/gloomystore/react-tag-maker.git" // git주소인데 github을 다들 많이 적어놓음
  },
  "main": "dist/index.js", // cjs가 읽어갈 파일
  "types": "dist/index.d.ts", // 타입 제공 파일, 이거 없으면 빨간줄 뜬다
  "module": "dist/index.js", // mjs 프로젝트가 읽어갈 파일
  "exports": {
    ".": {
      "import": "./dist/index.js"
    }
  },
  "homepage": "https://www.gloomy-store.com", // 내 웹사이트
  "license": "GPL-3.0", // 라이센스
  "keywords": [ // 키워드 검색하면 내 라이브러리 보여주세요
    "react-tag",
    "react-tag-maker",
    "tag-maker",
    "tag-edit",
    "tag-editor",
    "react-tag-editor",
    "react-tag-edit",
    "tags",
    "react",
    "input",
    "component",
    "next-tag-editor",
    "next-tag-edit",
    "nextjs-tag-editor",
    "nextjs-tag-edit",
    "nextjs",
    "next",
    "next-tag"
  ],
  "author": "GloomyStore", // 제작자
  "copyright": "Copyright © 2024 gloomystore",
  "description": "A customizable tag input component for React and Nextjs", // 설명
  "dependencies": { // 여기에 표기된 건, 내 라이브러리를 설치하면 자동으로 같이 설치해줌.
    "@babel/runtime": "^7.25.0",
    "@babel/runtime-corejs3": "^7.25.0"
  },
  "devDependencies": {
    "@babel/cli": "^7.24.8",
    "@babel/core": "^7.25.2",
    "@babel/plugin-proposal-private-property-in-object": "^7.21.11",
    "@babel/plugin-transform-runtime": "^7.24.7",
    "@babel/preset-env": "^7.25.3",
    "@babel/preset-react": "^7.24.7",
    "@babel/preset-typescript": "^7.24.7",
    "@testing-library/jest-dom": "^5.17.0",
    "@testing-library/react": "^13.4.0",
    "@testing-library/user-event": "^13.5.0",
    "@types/jest": "^27.5.2",
    "@types/node": "^16.18.104",
    "@types/react": "^18.3.3",
    "@types/react-dom": "^18.3.0",
    "cpx": "^1.5.0",
    "cross-env": "^7.0.3",
    "react-scripts": "5.0.1",
    "rimraf": "^6.0.1",
    "typescript": "^4.9.5",
    "web-vitals": "^2.1.4"
  },
  "peerDependencies": {
    "react": ">=16.0.0 <21.0.0",
    "react-dom": ">=16.0.0 <21.0.0"
  },
  "scripts": {
    "start": "react-scripts start",
    "test": "react-scripts test",
    "eject": "react-scripts eject",
    "clean": "rimraf dist",
    "build": "npm run clean && tsc && babel src/lib --out-dir dist --copy-files --extensions \".ts,.tsx\"", // dist 지워버리고 처음부터 다시 만들어주세요~
    "type": "npm run clean && tsc"
  },
  "eslintConfig": {
    "extends": [
      "react-app",
      "react-app/jest"
    ]
  },
  "browserslist": {
    "production": [
      ">0.2%",
      "not dead",
      "not op_mini all"
    ],
    "development": [
      "last 1 chrome version",
      "last 1 firefox version",
      "last 1 safari version"
    ]
  }
}
package.json 설정
{
  "presets": [
    [
      "@babel/preset-env",
      {
        "modules": false, // ES 모듈 사용을 위해 modules 옵션을 false로 설정
        "targets": "> 0.25%, not dead"
      }
    ],
    [
      "@babel/preset-react",
      {
        "runtime": "automatic",
        "importSource": "@emotion/react"
      }
    ],
    "@babel/preset-typescript"
  ],
  "plugins": [
    [
      "@babel/plugin-transform-runtime",
      {
        "corejs": 3,
        "helpers": true,
        "regenerator": true,
        "useESModules": true // ES 모듈로 헬퍼 코드 출력
      }
    ],
    "@babel/plugin-transform-react-jsx"
  ]
}
.babelrc 설정
{
  "compilerOptions": {
    // 최신 ECMAScript 버전을 대상으로 설정
    "target": "esnext",
    "module": "esnext",
    // node_modules 내에서 비상대 경로(import) 모듈을 검색
    "moduleResolution": "node",
    // .js 파일에서 타입을 처리하고 추론
    "allowJs": true,
    "declaration": true,
    "emitDeclarationOnly": true,
    // strictNullChecks랑 noImplicitAny 같은 엄격한 설정을 활성화
    "strict": true,
    // 여러 파일 간의 정보를 요구하는 기능의 출력을 금지
    "isolatedModules": true,
    // ES 모듈을 기본 가져오기(import)로 가져옴
    "esModuleInterop": true,
    "jsx": "preserve",
    "outDir": "dist"
  },
  "include": ["src/lib"]
}
tsconfig.json 설정
include는 내가 라이브러리에 포함할 폴더만을 설정한다.
나는 src/app.js에는 라이브러리 미리보기 화면, 실험용 화면을 넣었기 때문에
남들에게 보여줄 필요가 없었다.
export default function MyLibrary(callback: () => void, deps: any[]) {
  ...
}
라이브러리는 기본적으로 export default를 포함하는게 좋다.
설정하지 않으면
라이브러리를 사용하는 사용자가 사용하지 못하는 상황이 생김
근데 tree shaking 대응 시키려면
화살표 함수로 기능을 제작하고
마지막 줄에
export default Librarys 형태로 내보내야
사용자 입장에서는 import {Librarys} from '...' 형태로 가져올 수 있다.
최신 5버전대 웹팩에서도 named export를 한 모듈이 tree shaking 될 확률이 높으므로
가능하다면 그렇게 할 것
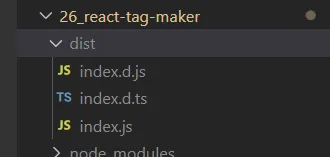
이제 npm run build를 하면 딸랑 3개의 파일이 나오게 되는데,
사실 index.js만 있어도 작동 자체는 되지만
라이브러리를 사용하는 사용자에겐 빨간줄이 그이게 된다.
타입이 확정되지 않거나 불안하면 나타나는 현상인데
그걸 방지하기 위해
"declaration": true,
"emitDeclarationOnly": true,
이 옵션을 넣어 d.ts도 생성되도록 한다.
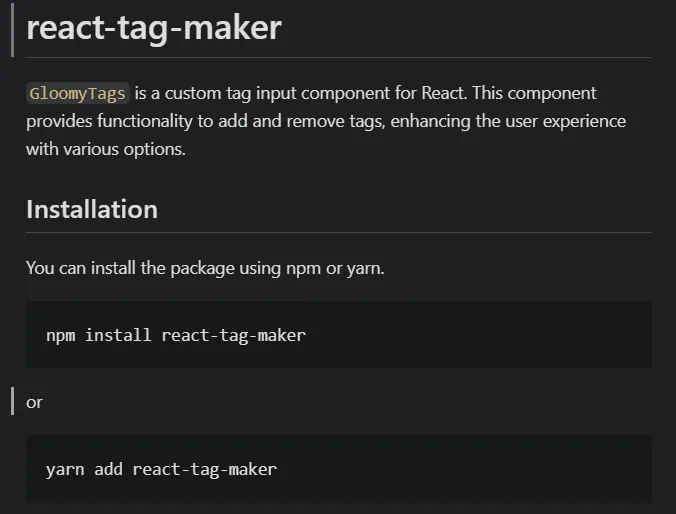
README.md 파일 작성
이제 라이브러리를 사용할 사용자를 위해
마크다운 문법을 사용하여 예쁘게 문서를 만든다.
실무할 때는 새 프로젝트 만드는 일이 자주있는 일은 아니라서
아마 마크다운 어색한 분들도 많겠지만
인터넷에 정보가 워낙 많아서 쉽게 적을 수 있다.
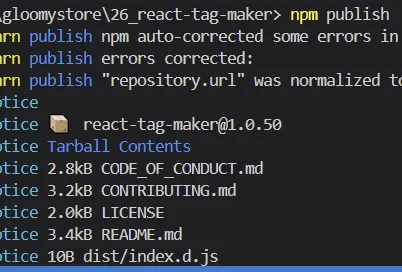
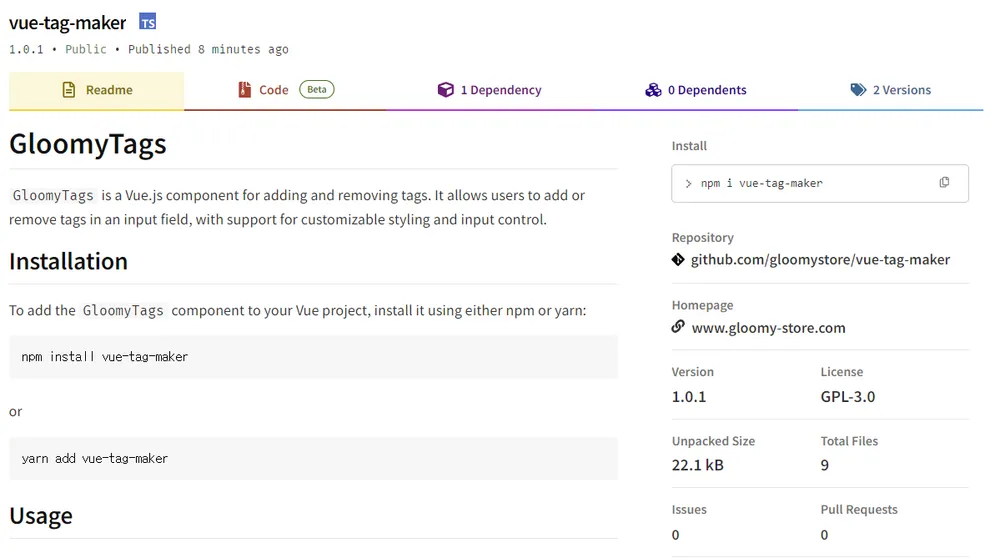
이제 npm publish 명령어를 치면
브라우저로 로그인하라고 뜰거고
라이브러리가 무사히 배포된걸 알 수 있게 된다.
한가지 주의할 점은,
누군가가 내가 올린 라이브러리를 의존성 설정 해놓으면
영원히 삭제할 수 없게 되니
개인정보는 절대로, 네버,
반드시 조심해서 올리도록 하자.
끝
[FE 최적화] CSS transform은 정말로 reflow를 하지 않을까?
프론트엔드 최적화에 대해 배울 즈음,다들 transform의 비용이 저렴하다는 것을 듣게될 것이다.출처: https://developers.google.com/speed/...
프론트엔드 npm 라이브러리 제작하기
모름지기 개발자라고 하면 다른 사람이 쉽고 편하게 사용할 수 있는 라이브러리 제작정도는 한 번 쯤 목표로 잡아본 적이 있지 않을까 한다.웹팩과 같은 모듈 번들러에 대한 기본적인 이해가 필요하기 때문에 진입장벽이 생각보다 높지만,한 번 해보면 그렇게까지 어려운건 아니라는걸 알게된다라고 했지만 사실 거의 일주일을 삽질하고 자꾸 cjs로 빌드돼서 너무너무너무 힘들었다 ^^하지만 결국해냄!
PM2 프론트엔드 프로젝트(Nextjs, React, Vue) Jenkins로 자동배포 시스템 만들기
프론트엔드도 자동배포가 가능하다.하지만 이걸 알아내는건 쉽지 않았다.그동안 남의 기술 블로그들을 보면서,왜 해보지도 않고 대충 배껴서 적었지?어째서 되지도 않는걸 되는 것처럼 적어...
아이폰 safe-area 대응하기 (아이폰 X 이상, 이하 구분하기)
@supports (-webkit-touch-callout: none) { /*아이폰 전체*/ padding-bottom: 30px; .padding-botto...
댓글: 0